By James doyle
“Dear, I can see light through the door”, stated my darling wife.
“That IS what a window is for, Honey”.
“Granted, but I don’t think the light should actually be showing through the joints in the wood”.
The original door of our 1988 Willard trawler was tired to be sure. It had provided yeoman service for many years but was now showing its age. It was a standard teak frame door with non-replaceable quarter-inch glazing, undersized hinges, and a “marine” lock set.
The once-beautiful teak had been slathered for years with Cetol and was now a muddy yellow-brown. The tiny hinges had worn down until the bottom of the door scraped the sill. To add insult to injury, the hinge pins were on the outside of the door, so all an enterprising thief had to do was remove the pins and pull the door away to gain entry. The thin plastic window was so cloudy from UV damage that it looked like we were in heavy fog even on a sunny day. The lock set was a comically poor design and sized for a dollhouse.
A new entry door had been on our upgrade list since we purchased the Willard several years ago. We didn’t have anything pressing during the winter, so maybe it was time for a long-overdue upgrade.
What is on your list for a perfect new door? We had been talking about it for years, but now was the time for real design work. First and foremost, the door must be sturdy and secure. A vented bottom would be great, but it must keep out the larger four-legged vermin as well as the two-legged varieties. A decorative pattern for the lower vented section would be nice, but the openings must be too small for a long, skinny arm to reach through and open the lock from the inside. This was also a largish door, so a standard Schlage lockset would be appropriate. Most marine locks were either toys or junk anyway. A long piano hinge in lieu of standard hinges should work fine.
We decided a solid sheet of aluminum would form the backbone of our new door. A 1/2” thick plastic window and wood for the rest of the frame would be attached to the metal armature, creating a very sturdy door indeed. Just to make matters more interesting, I planned to reuse the wood from the original door. No one is cheaper than me after all, but for some reason, I just have to keep proving it. We would start by disassembling the door for materials and then see what could be salvaged. Any other wood we’d have to find elsewhere. The old door fell apart after a few good whacks with my fiber mallet. We were committed.
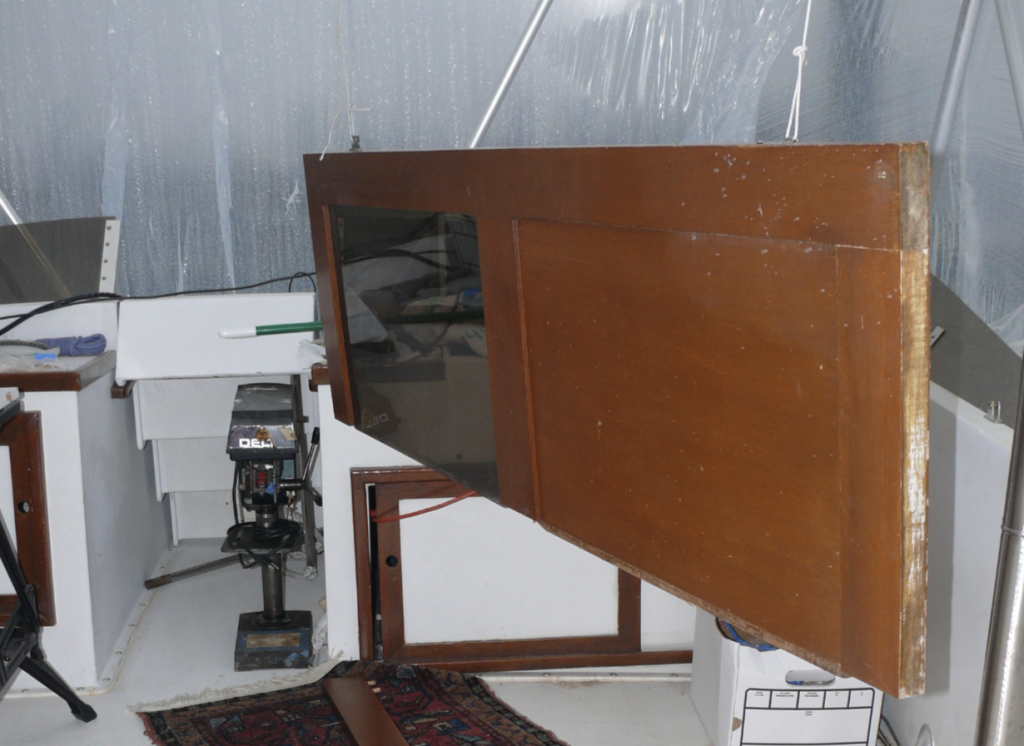
Did I mention that we are live-a-boards in Connecticut? This being January, Donna, clever girl that she is, suggested that with a new door under construction and the old door being cannibalized for its wood, perhaps a temporary door might be in order. “OK, dear”, I can deny her nothing. It seems that she is not a big fan of winter camping.
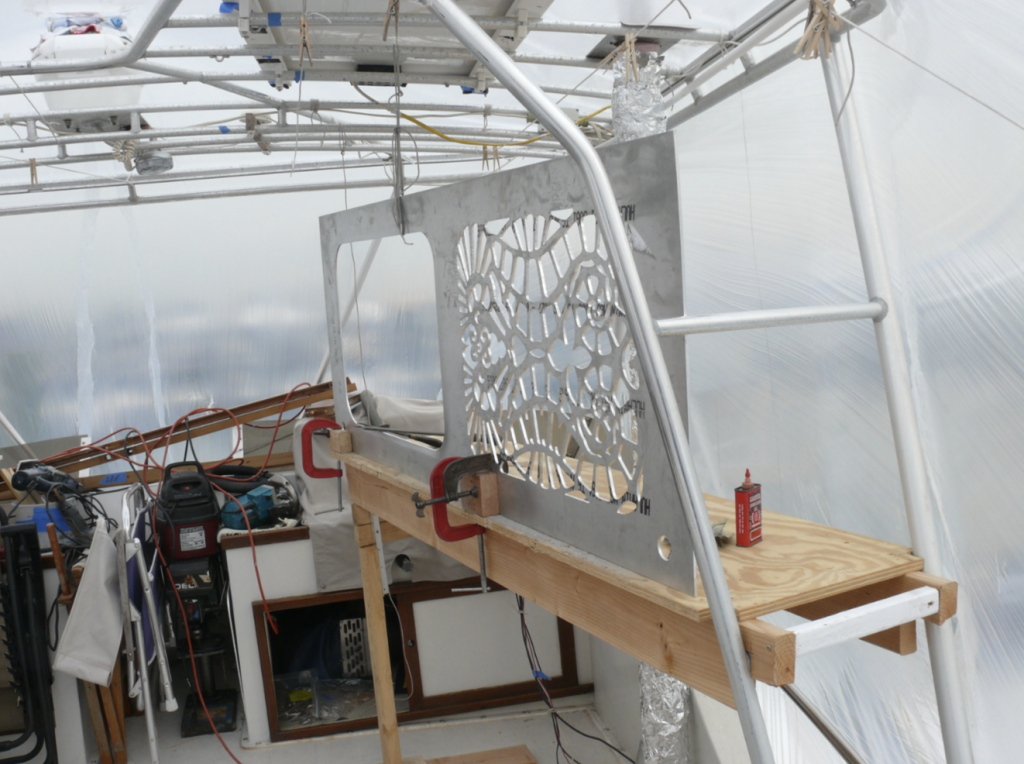
I’d also needed a sturdy, flat workbench for all the cutting and machining. I’d complete the aluminum plate first and then glue the wood frame together. Fortunately, we cover the bridge with clear plastic for the winter. This creates a perfect place to work in the winter sun and also leaves the construction mess away from the living area.
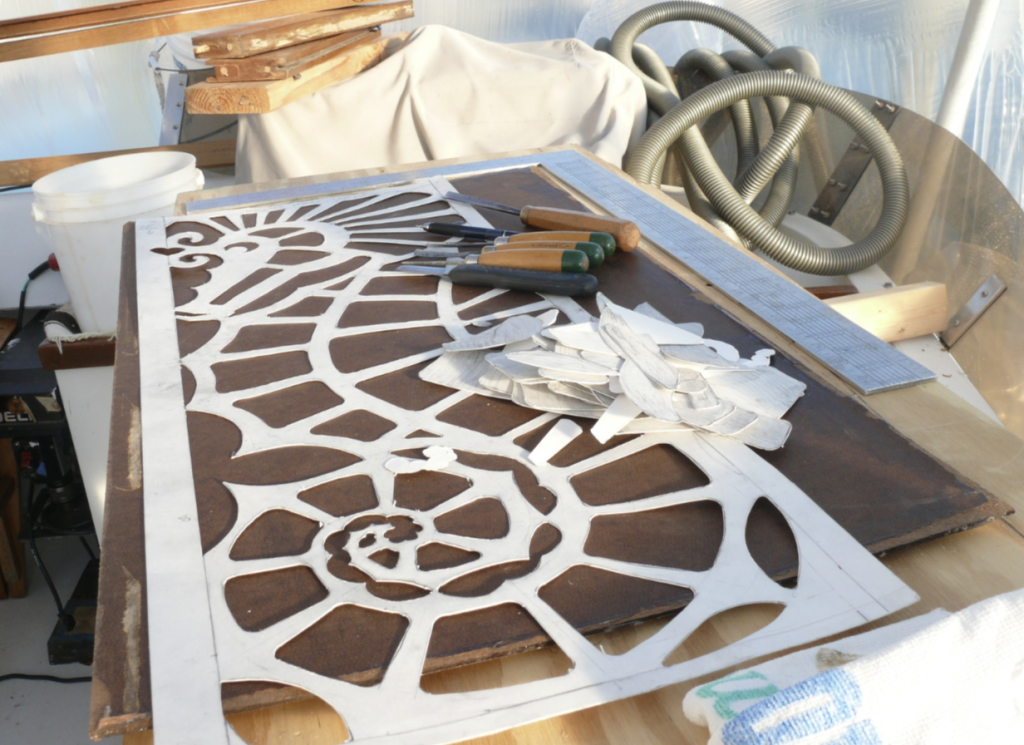
I sent away for the sheet of 3/16” aluminum plate for the door and 2” angle iron for the door jambs, and got to work on the design for the lower part of the door. We always loved the stoic majesty of seahorses, and after playing around with a couple of designs, I came up with an Art Deco-type motif with maybe a bit of Grateful Dead album cover thrown in for good measure. I drew the final pattern onto a single large sheet of sturdy poster board and then cut out the design using a wood carving gouge and linesman knife.
A demolition-grade wood chisel was needed to remove the old teak door jambs. These had been glued in with the notorious 5200 (an adhesive) and did not give up without a fight. There would be no salvaged wood here. All I had left was a pile of splinters. With the jambs removed, a few things came to light. First, the walls of the superstructure were bowed outward by at least 1/2” from top to bottom. This wasn’t a game-changer, but it can be a bit of a pain trying to fit a flat door to a curved wall. The other thing to note was that the thick, old door jamb had stolen at least 3” of width from the opening. This is a lot of space on a narrow door. The new design would remedy this. The entry would feel like we were walking through the doors of a grand cathedral in comparison.
The Aluminum angle iron arrived that I would use for the new door jambs. I cut these to length and mounted them to either side of the opening. The jambs would be held in place by holes drilled through the wall and into 1/4-20 threaded holes that I made in the outer face of the jambs. 1/4” bolts passing through the wall and then into the matching holes would hold the jambs in place and could only be removed from the inside.
The plate for the door finally came in (the folks at my UPS store were not happy with me ;). I rough-cut this and began mounting the hinge. The piano hinge would be screwed into the edge of the door in something of an unconventional fashion. This was a nice, secure mounting arrangement, but it required a bit of patience, and getting it exactly right can be a bit tricky. The edge of the plate was carefully drilled and tapped for the length of the hinge. Dozens of 6-32 machine screws would then hold the hinge to the edge of the door plate. The door jamb got the same treatment.
Next, the fun part. I began transferring the lower door seahorse pattern onto the aluminum door blank. This is a simple enough procedure, but you have to make sure the alignment is just right and that the pattern can not move. Then simply color in the exposed area like an obsessed preschooler. Black magic marker makes a good high-contrast image. Once one side is complete, flip the pattern over, then do the matching, mirror image on the other side.
Now for the real work. I settled on 1/2” corners for most of the cutout areas in the pattern. These I carefully drilled out, leaving nice, large access holes in the aluminum for the jigsaw blade. Once all corner holes were drilled for a section, I lubed up the jigsaw and rough cut just inside the marked area of the pattern. This was messy work, but it did not have to be perfect as long as you didn’t stray out of the black area. Donna appreciated the fact that I was out of her hair for hours at a time.
Just as a side note, if you ever have a large project like this, then it pays to get the proper drills and cutting blades for the particular material you are working with. McMasters-Carr has all sorts of great stuff. You can spend hours trolling their catalog online. I ordered special jigsaw blades made specifically to cut aluminum.
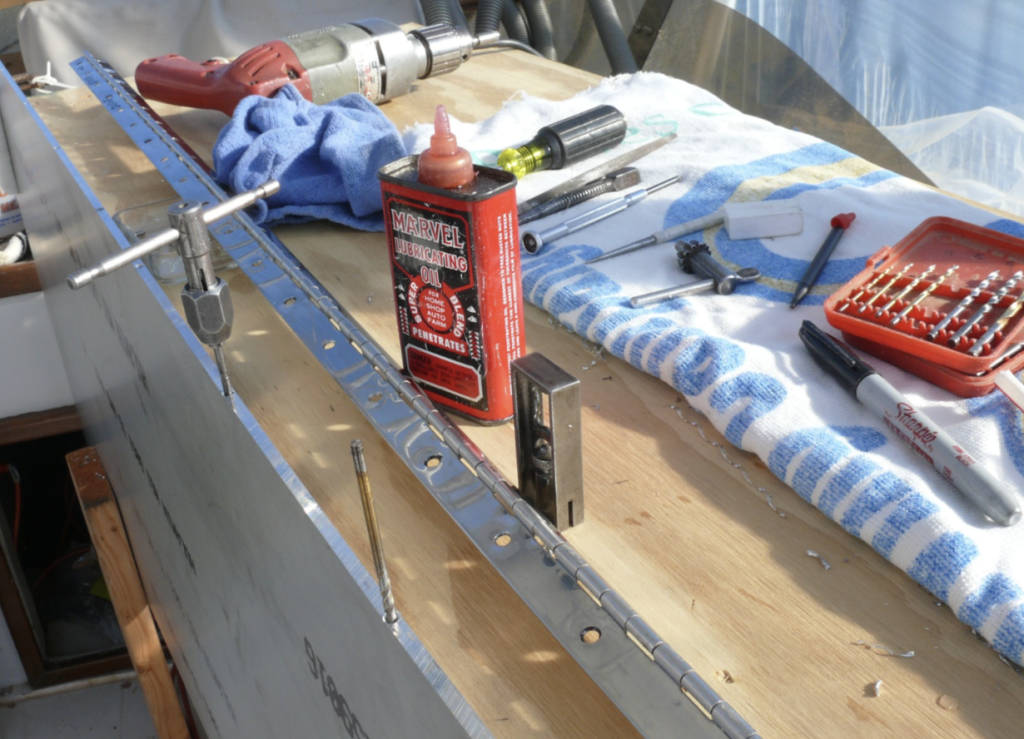
Now, if you thought cutting and drilling aluminum for hours on end was fun, you are in for a real treat. I could have spent the rest of my life cleaning up the rough cuts from the jigsaw with a file, but there was a much better way.
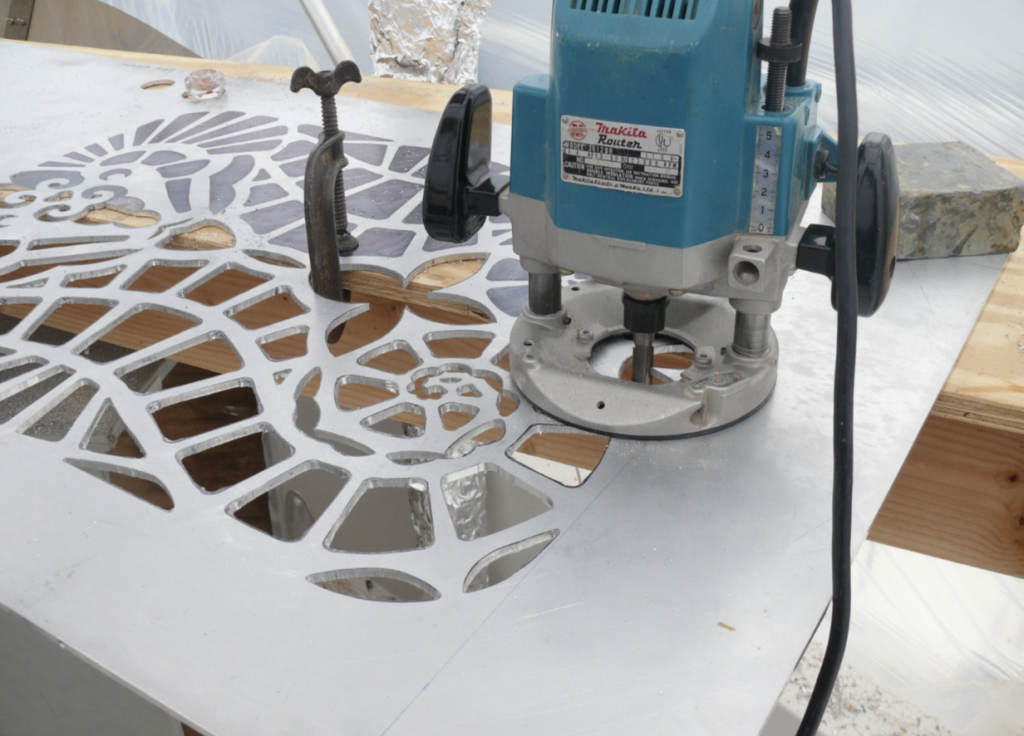
I got out my massive Makita 3612 router and used carbide bits to complete the finish cuts just up to the edge of the pattern. The Makita is a beast of a tool. It sports a 1/2” arbor and will pull over 14 amps as it effortlessly chews through the aluminum plate and your body parts as well if you are not careful. It leaves behind a beautiful mirror finish cut if it is properly used. If not, it will tear up everything in its path. It is not a tool for the faint of heart, but it is the only one for the job at hand. A smaller router would not have the mass or brutish power for the task and would ping-pong around within the workpiece. Router work like this, also shaves off prodigious quantities of razor-sharp Flechettes (French for darts) at high speed. These end up everywhere, including your eyes and skin, if not carefully protected. I had one stuck in the heel of my foot for years and finally had to dig it out the hard way. Donna called me “gimpy” for a week.
Frankly, any sane person would have outsourced the entire job to a place that does plasma cutting, but what would be the fun in that? Besides, if you want to call yourself a craftsman, then you have to walk the walk, as they say. Truth be known, I love projects like this, if that can be believed.
Once the lower pattern was routered and cleaned up, I cut out the area for the window. Then the holes for the handset and deadbolts were carefully planned and cut. There are no second chances when working with a metal plate; it’s best to get it right the first time.
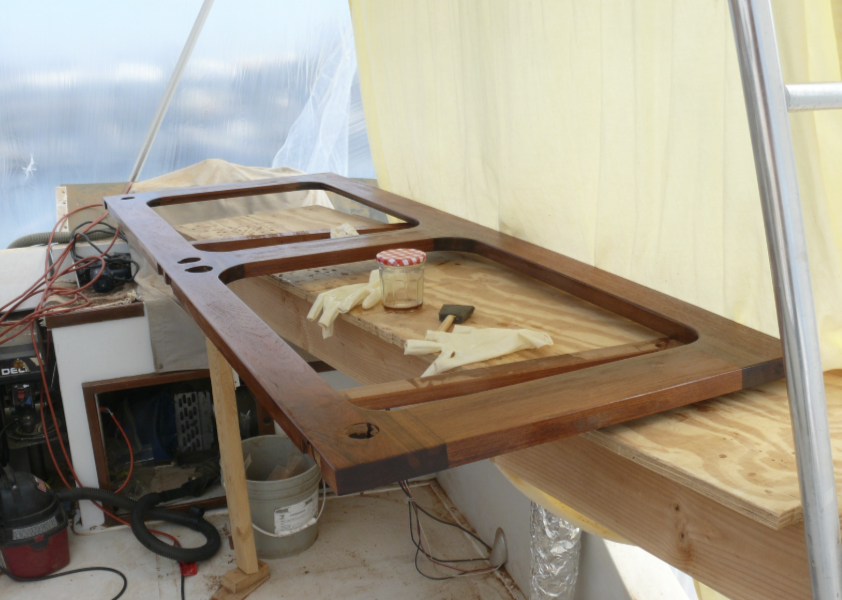
The wood for the inside of the door went together straightforwardly and came out pretty well considering it was pieced together Frankenstein-like from parts of the old door, bits and bobs that I had lying around, and random dumpster diving finds. I put on several coats of varnish inside and out before it was screwed to the aluminum frame.
Finally, I visited my friends at Select Plastics in Norwalk, CT, just down the road from me. Select re-glazes old hatches and is the go-to place for new marine-grade plastic glazing. I paid a princely sum for a beautiful piece of 1/2” cast acrylic cut to my exact shape. You can use special plastic drill bits when working with expensive stuff like this, or be very careful indeed. Always make any holes a bit oversized.
The plastic will expand and contract in the heat quite a bit; your designs should always allow for a lot of movement.
The plastic is through-bolted from the inside using 1/4-20 pan head machine screws with thin nylon washers. I never use countersink-headed screws when working with plastic. They look great flushed up with the outer surface, but if the beveled head is screwed in too tightly, it is just too easy to crack the plastic. I see this all the time, even from the manufacturer. There are all sorts of thin head, nice-looking fasteners out there. IKEA uses fasteners like these to great effect, bolting together beds and the like.
Projects like this are a tremendous amount of fun and satisfaction, but the time and cost may be hard to rationalize in the real world. However, when all is said and done, they do tend to make a boat a bit more special. A source of pride for the builder as well as the owner.